Synology Password-less SSH
Secure Synology NAS SSH connections for automated tasks with key pairs.
My goal is to set up automated restic backups to a Synology NAS from my laptop. Manually entering a password for each backup defeats the purpose of the automation. Just as we use public/private key pairs in UN*X to bypass password prompts, we can apply the same idea for automated access our Synology. It’s built on Linux after all.
This guide is based on a Synology system running DSM 7.1.1. Keep in mind that future DSM versions might introduce changes, so some steps could vary.
We’ll assume we have already generated a public and private key pair. If not, there are numerous resources available online, such as this one.
Enable SSH
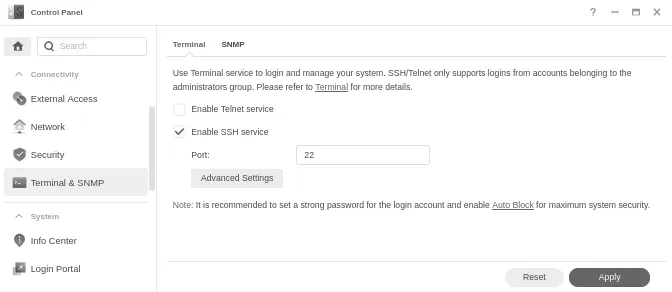
First, we need to enable SSH on the Synology NAS. Navigate to “Control Panel → Terminal & SNMP” and check the "Enable SSH service” option. At this point, we can connect from our laptop using ssh user@synology (replace the username and Synology address), but we’ll still be prompted for a password.
User Home Folders
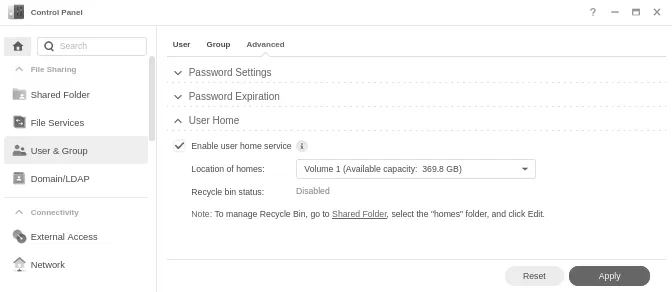
To enable automated authentication, we need to upload a public key to the Synology. This requires enabling user home folders. Go to “Control Panel → User & Groups”, select the “Advanced” tab, and in the “User Home” section, check “Enable user home service”. We should now see a new ‘home’ directory in the Synology File Station.
Adding a Public Key
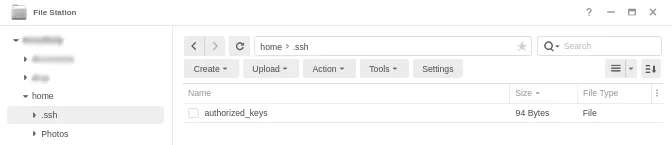
Now, let’s add a public key to our user’s home folder on the NAS. Using File Station, locate the /home directory for the user used for the automation. Inside this directory, create a new subdirectory named .ssh. Within this directory, create a file named authorized_keys (with no extension). Finally, paste the entire contents of the public key into this ‘authorized_keys’ file. The public key of course, the private one should never leave the laptop.
For SSH to function correctly, we need to change the permissions for the .ssh folder and its contents. Start by logging in via SSH with the password. Once connected, change the permissions of the .ssh folder to ‘drwxr-xr-x’. Similarly, for the authorized_keys file within that folder, set its permissions to ‘-rw-r--r--’.
$ chmod 0755 .ssh/
$ chmod 0644 .ssh/authorized_keys
With these steps completed, we now have password-less SSH access to the Synology NAS via ssh user@synology. We won’t be promted for a password any longer.