Assembling a 3D Printer
Building an advanced LEGO kit with the kids.
Ever since the RepRap arrived on the scene way back in 2005, I’ve been debating whether I should buy a 3D printer.
They look undeniably cool, but do I really need more plastic clutter in my life? Probably not. So, I held off. I’d occasionally peek into 3D model libraries like Printables and Thingiverse to see what people were making. And, honestly, most of the uploads seemed to be figurines, fidget toys, or attachments for the printer itself. If those prints bring you joy, more power to you, but I had a different idea.
I imagined a world where manufacturers would release 3D models to replace broken parts—the way you can download a firmware upgrade today. That world didn’t quite materialize; instead, we got our “throw it out and buy a new one—don’t even dare repairing it” economy.
Why Now?
Spoiler alert, as the title gives away, I finally bought a printer! What changed my mind?
First, there was the rise of the Bambu Lab printers a few years ago. The reviews were raving about how much easier 3D printing had become. But then came the backlash over locking down their machines.
That’s what brought me back to Prusa. They are a long-time player in the market; they have a solid track record, and they are openly friendly to the open-source community—plus, they’re European. I noticed they sell their printers either assembled or as a kit, and that was what finally pulled me over. Assembling it with my kids sounded like a fun time, an advanced LEGO build, so to say.
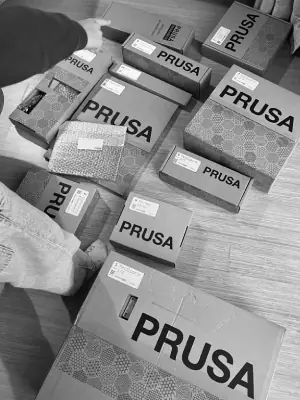
The Family Build
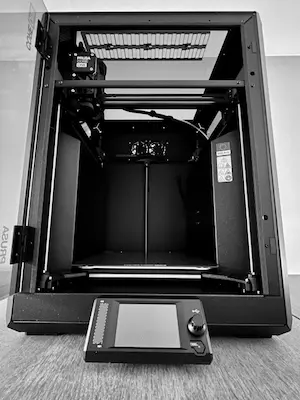
The printer, a Prusa CORE One, arrived last week, and we had an absolute blast! The assembly took a little over two full weekend days of focused work. My son was completely hooked, constantly nagging me to continue after dinner and peppering me with 3D-printing questions.
They use a 3D printer at his school, mainly for small projects like keychains, but the teacher always handles the actual printing. While we were building ours, he kept remarking on how much better he now understood the mechanics. The assembly is time-consuming but definitely not hard—my 10-year-old could probably build the next one solo.
Once assembled, the printer runs a self-test. Ours identified a screw that was too tightly fixed, which took us maybe 10 minutes to locate and adjust. Then, it was time for the first print: the example keychain that comes with the machine. Watching an object materialize out of thin air, tiny layer by tiny layer, was truly magical. A big sense of achievement after building for hours. High fives all around.
The Printing Process
A 3D printer is a touch more complex than your standard paper printer. You have to create or download a 3D model, and then prepare it for printing using a specialized application called a “slicer.”
Think of the “slicer” as the print preview for a paper document, but on steroids. When printing a document, you select paper size, color, and orientation. With 3D printing, the slicer literally carves your 3D model into hundreds of flat layers. You have to specify settings like layer thickness, which filament (the “ink”) you are using, how to fill the object’s interior (infill), and more. It’s more involved than a paper printer, but easy enough to learn.
The Prusa CORE One impressed me right out of the gate. Given my lack of 3D printing experience, I was expecting thick, rough, and highly visible layers. But today’s printers are way beyond that. You can still tell it’s a printed object, of course, but the level of detail these machines achieve is stellar. How does it even print a layer at one-tenth of a millimeter?!
Moving Beyond Toys
After the keychain, we tried some downloaded models: a crown my daughter used for a book presentation, and a handy bottle drying rack, which was a great exercise in learning about overhangs and infill strength.
These are all still “toy” objects, though, and I believe the printer will only truly prove its worth when I can use it to fix broken items around the house. So, our next project is a bracket to mount a Velux window remote to the wall. Amazingly, even obscure objects like the bracket can be found online.
We only have PLA filament right now. It’s the easiest to print with, but it’s not as strong as PETG, which is generally recommended for items that need to snap together or handle stress. I’ll order a spool of PETG to see how it differs from PLA. Once that bracket is successfully mounted, I can try my hand at designing and printing my own objects from scratch.
Safe to say, these past few days have been a ton of fun. We’ve learned a lot about machine assembly, slicing, and the 3D community in general—and we’ve barely scratched the surface!
Was it worth it? Only time will tell. We’ll have to wait until the excitement fades to see if I actually use the printer for practical fixes.